Homemade Sweet Relish 101: A Step by Step How-to

Making homemade relish and pickles is a fun way to turn summer’s bounty into good eats all year ’round. Even if you’ve never “put up” anything in your life, you can do this! Don’t let Aunt Bea and her “kerosene cucumbers” scare you off. This homemade sweet relish is easy peasy and can be adjusted lots of ways to suit your taste or utilize the veggies you have on hand.
This is the homemade sweet relish I grew up eating and making. I can assure you that store-bought doesn’t even come close. Have you read the label on store-bought sweet relish? Gums, high-fructose corn syrup, preservatives, artificial colors and mystery “flavors”. Bleh. In the first place, when you make your own, you control what goes in. In the second place, the flavor and texture of homemade sweet relish is soooo much better than store bought! More good news – you don’t need any expensive ingredients or fancy equipment – just some fresh veggies, seasonings, canning jars and lids and a large pan for processing.
Admittedly, it IS a bit of work to chop all the veggies, however I find the process relaxing. There’s something very satisfying about taking simple ingredients and creating something complex and delicious. And I love how it makes me feel connected to family traditions and the many generations of women who put up preserves for their families.
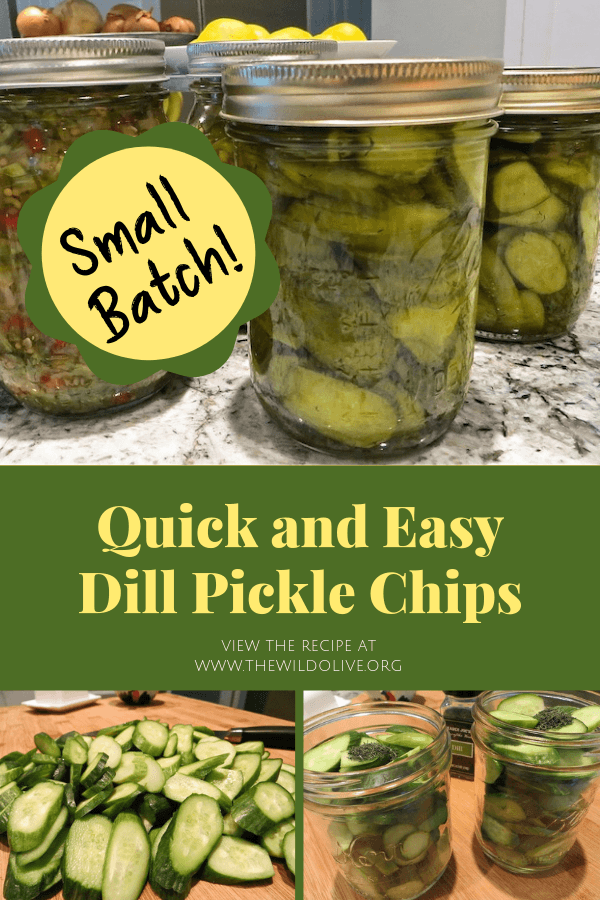
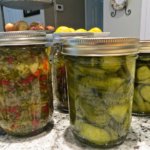
Psst: If you’d like the recipe for the pickle chips shown next to the relish in the image above, you can find my recipe for Small Batch Dill Pickle Chips here.
Pin this Homemade Sweet Relish recipe for later!

Here’s what you need for 4 pints of the yummiest homemade sweet relish ever:
Veggies:
- 1 1/2 qts. finely chopped Persian or pickling cucumbers
- 2 cups finely chopped red pepper
- 2 cups finely chopped green pepper
- 3 cups finely chopped onion
Salting Mixture:
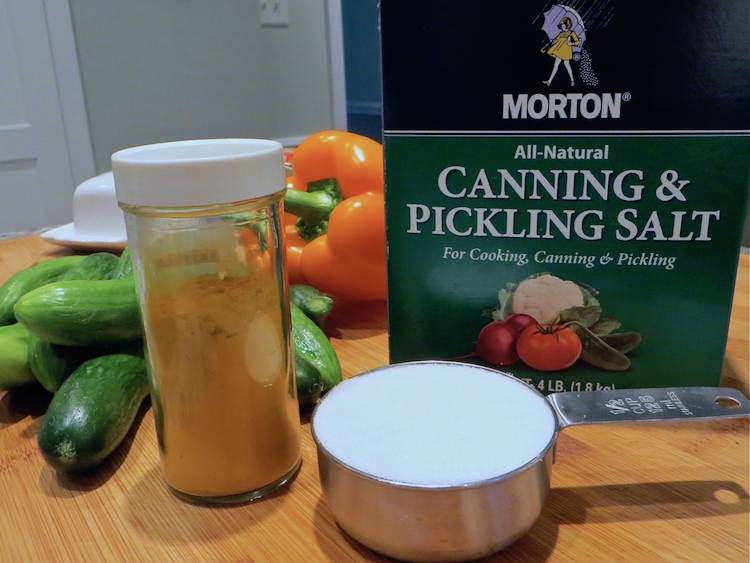
- 1/2 cup pickling salt
- 1 Tbsp. turmeric
Sweet Brine Mixture:
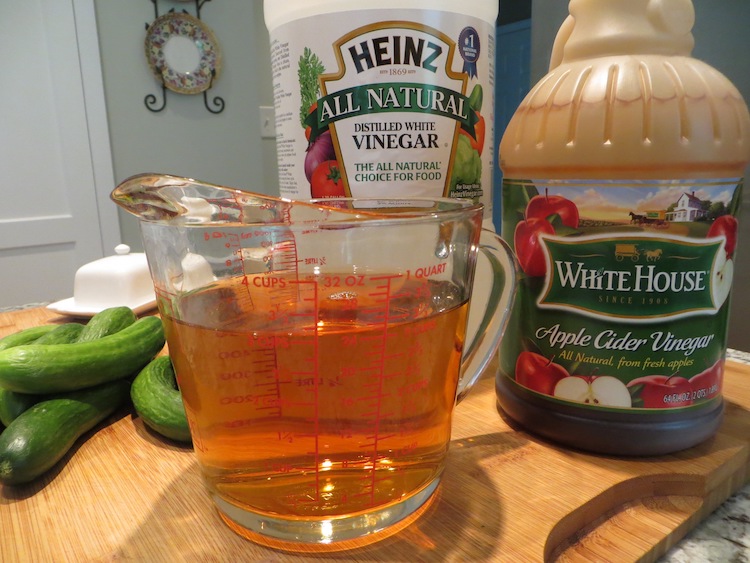
- 1 cup apple cider vinegar
- 2 cups white vinegar
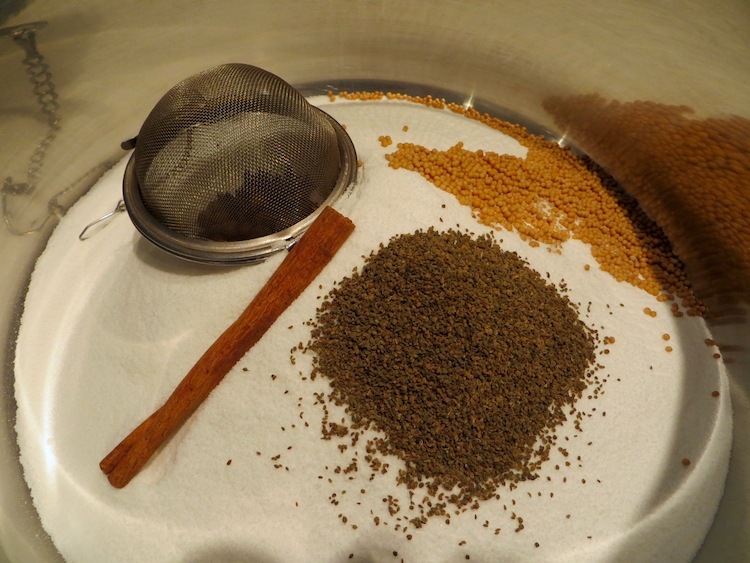
- 4 cups sugar
- 1 1/2 Tbsp. mustard seed
- 1 1/2 Tbsp. celery seed
- 1 stick cinnamon
- 1 tsp. whole cloves
- 1 tsp. whole allspice
A Few Ingredient Notes:
- You can use either the thin Persian cukes (seen in my pictures) or pickling cukes. However, do not use regular salad cukes – they have too many seeds and will get mushy.
- For the peppers feel free to use 4 cups total of any color sweet pepper you like, for example, all red, all green, a mix. I use red, yellow and green for flavor and a pretty look.
- Although you have choices with the cukes and peppers you use, you absolutely need to use pickling salt. Usually it’s easy to find either in the grocery aisle with the rest of the salts or at a store like Walmart with the canning supplies. Pickling salt is pure salt with no additives that can cloud your brine or add off flavors. Of course you don’t have to save it for canning – feel free to use pickling salt in place of regular table salt in your cooking.
- The recipe specifically calls for a mix of flavorful apple cider vinegar and neutral white vinegar. This combination will give your brine a nice flavor that isn’t overpowering. You can use all white vinegar, but don’t use all apple cider vinegar; the brine will be too “loud” in flavor.
A Few Equipment Notes
- You will need either a tea brewing ball or some cheese cloth to contain some of the spices when you prepare the brine.
- You don’t need a dedicated canner to process the jars, but you do need a pan large enough to hold the 4 pint jars and enough water to cover them by an inch. You also need some kind of rack or insert to keep the jars from touching the bottom of the pan. I use the insert from my old pressure cooker.
- Make sure your lids are new – never reuse old lids to process preserves. They won’t seal well and could transfer icky things to your delicious homemade relish.
- A funnel makes quick work of filling the jars. I love mine and use it all the time, not just for canning. It makes quick work of portioning anything into bags or storage jars!
- Canning jar lifters are the safest way to remove the jars from the boiling water bath, but tongs will do in a pinch in you are EXTRA careful.
- Scroll down to the bottom of the post for other recommended resources for canning.
Here’s What to Do:
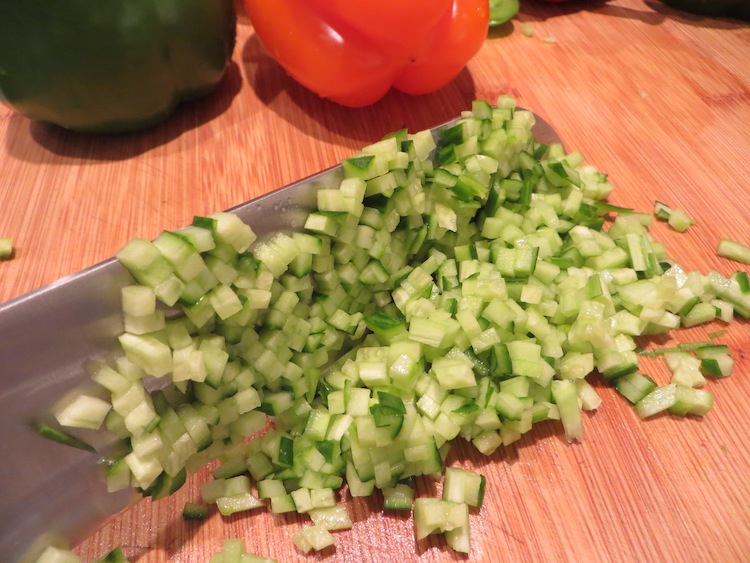
Using your best, sharpest knife (or a mandoline) slice the cukes into long, thin strips.

Then dice the strips into small chunks, about the size of a split pea.
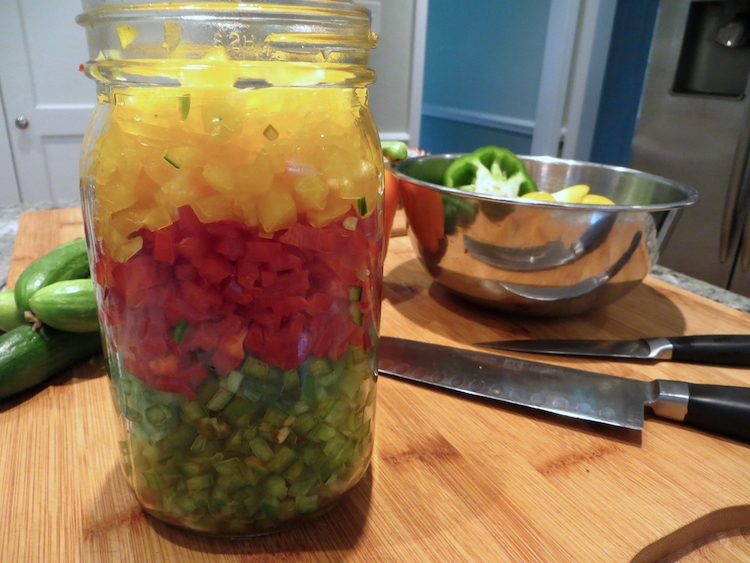
Next dice the peppers and onions into slightly larger pieces.
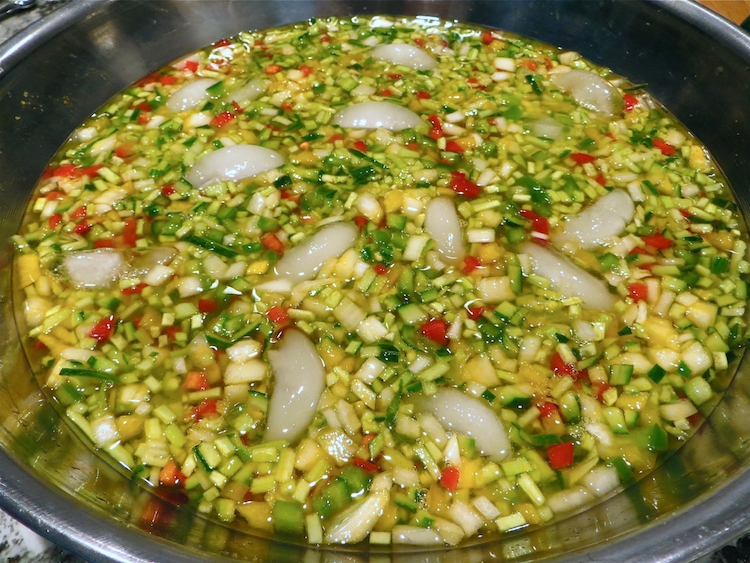
In a large, glass or stainless steel bowl combine the pickling salt and turmeric.
Add the diced veggies and stir to thoroughly combine.
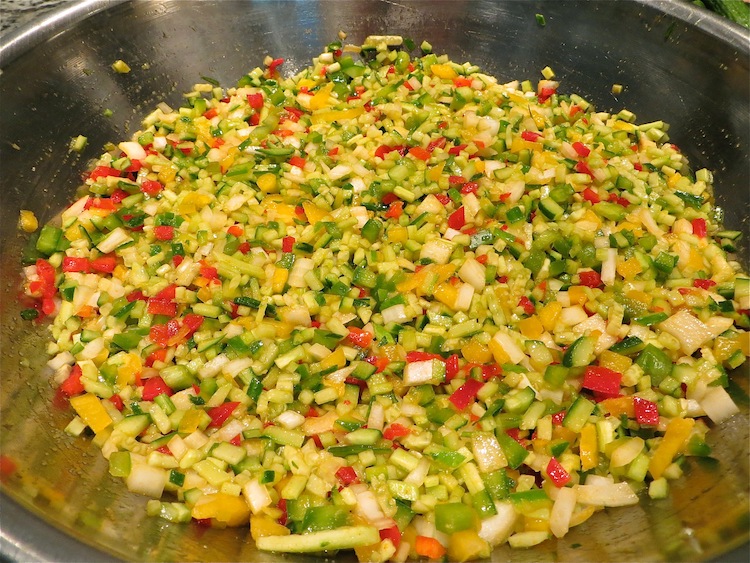
Cover veggies with cold water and a few ice cubes. Stir, and let brine for 2 hours.
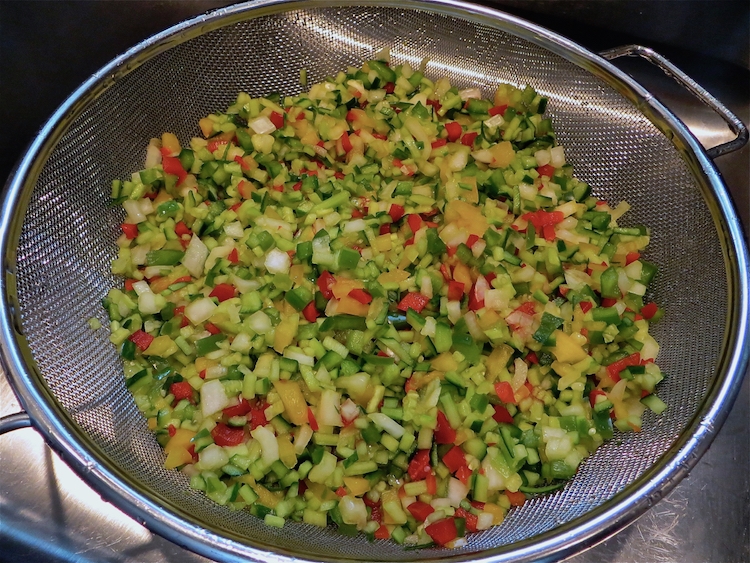
Drain and thoroughly rinse veggies.
Prepare the pickling brine and the canning jars:
Wash and dry 4 pint canning jars and the new lids. Fill canner or large stockpot with enough water to cover the jars by one inch. Place jars in water and bring to a boil. Turn off heat and allow jars to remain in the hot water while you prepare the relish. Place lids in a small sauce pan and cover with water. Bring to a simmer and keep warm – do not boil the lids.
Combine the brine ingredients in a large stainless steel stock pot.
Keep cloves and allspice berries in an infuser or sachet of cheesecloth so you can easily remove them.
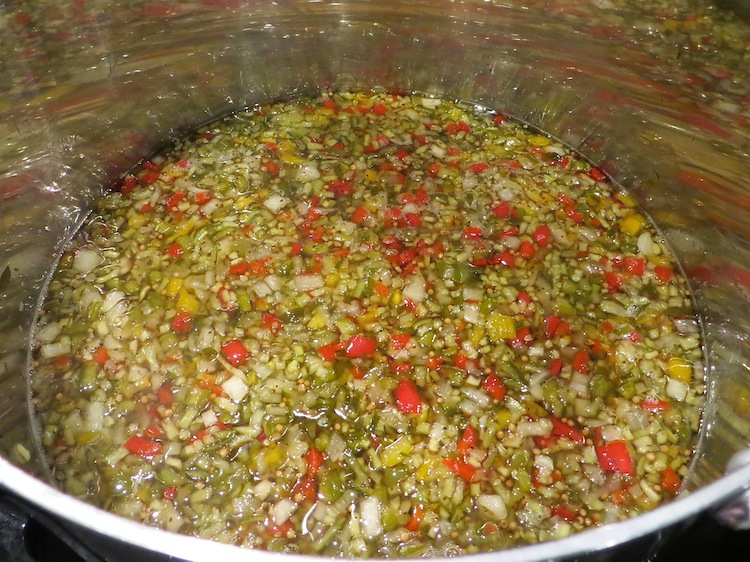
Bring brine ingredients to a gentle boil and simmer ten minutes.

Remove cinnamon stick and infuser/sachet with cloves and allspice. Leave in the celery and mustard seeds. Add drained veggies.
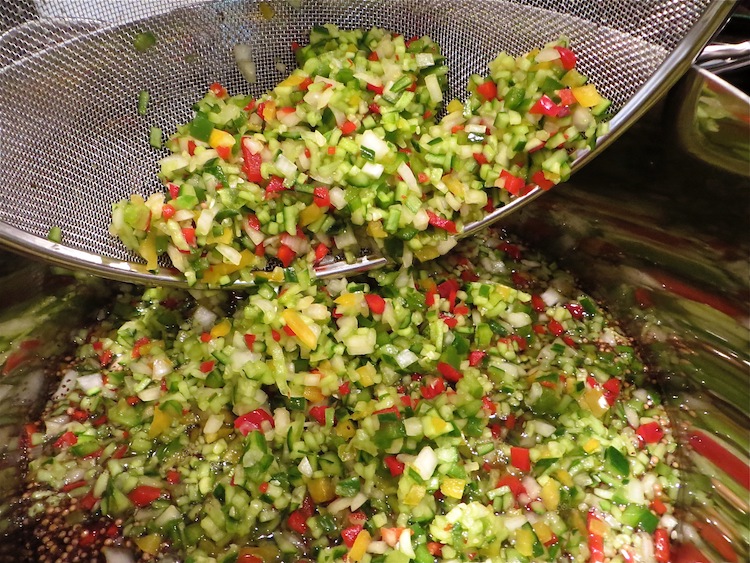
Bring veggie and brine mixture to a boil, stirring occasionally. Remove from heat.
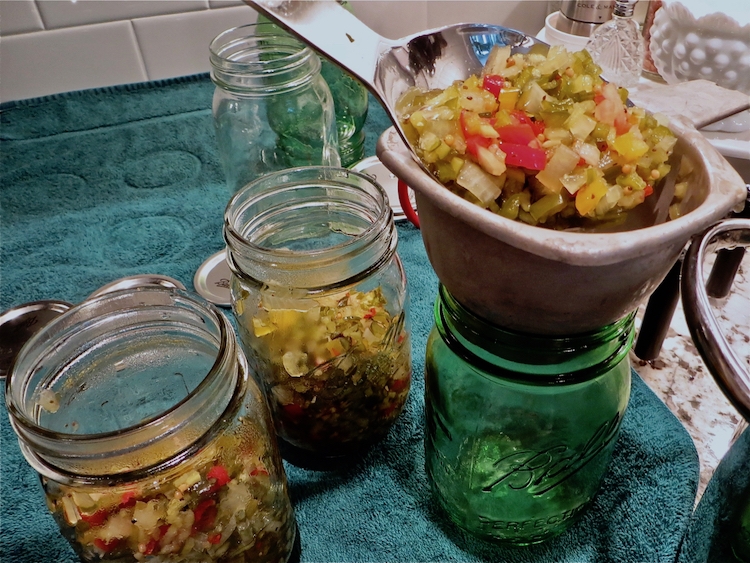
Fill the Jars:
Meanwhile, remove jars from hot water bath and drain on a clean dish towel. Crank up the heat under the water to get it back to a vigorous boil. While jars are still hot, divide the veggies evenly between the four pint jars. Next add hot brine to jars to fill them to 1/2″ below the top of the jar (referred to as leaving 1/2″ of headspace). Using a clean washcloth or wet paper towel, wipe the rims of the jars clean, place hot lid on jars and screw shut to “fingertip tight”. Specifically you don’t want the lids so loose that the brine can leak out in the hot water bath nor so tight that the air can’t escape to properly seal the jars.
Processing and storage
Carefully place filled jars back into the boiling water bath. You may need to remove some of the water for the now-filled jars to fit without overflowing the pan. You need the jars covered by 1 inch of boiling water, but leave enough space in the pan for the water to have room to boil. Bring water back to a boil, cover pan loosely and once the water is boiling, set a timer for 10 minutes.
When timer goes off, turn off heat and remove pan lid. Wait five minutes before removing jars from the water bath. Carefully lift jars from water and place on towel to drain and cool. You should hear a “pop” as the jars cool and the lids seal. If any jars do not seal, refrigerate your homemade relish immediately and use within a month or two. Properly sealed jars of relish can be stored in a cool, dark cupboard for up to a year.
Enjoy your homemade sweet relish on hot dogs and burgers, salads, deviled eggs and egg salad and so much more!

Here are a few more of my favorite recipes for preserving Summer’s bounty:
Recommended Resources
A must-have resource for every home canner is The Ball Blue Book to Preserving. The Blue Book is the bible of home canning, full of step by step instructions, safety precautions and delicious recipes. Amazingly, this book has been in print since 1909! Of course it is updated periodically with the latest best-practices in food safety and recipes that appeal to current readers. Accordingly, be sure you purchase the latest edition for up to date information.
For more delicious recipes with safe, reliable instructions, The All New Ball Book of Canning and Preserving is also great.
If you do any home canning from an older cookbook or heirloom family recipes please consult the current Blue Book for processing times or any other considerations that may have been updated since grandma created her blue ribbon winning pickle recipe.
Sweet Veggie Relish
Ingredients
Veggies
- 1 1/2 qts. finely chopped Persian or Pickling cucumbers
- 2 cups finely chopped red pepper
- 2 cups finely chopped green pepper
- 3 cups finely chopped onion
Salt Mixture
- 1/2 cup pickling salt
- 1 Tbsp. turmeric
Brine
- 1 cup cider vinegar
- 2 cups white vinegar
- 4 cups sugar
- 1 1/2 Tbsp. mustard seed
- 1 1/2 Tbsp. celery seed
- 1 stick cinnamon
- 1 tsp. whole cloves
- 1 tsp. whole allspice
Instructions
Prep the Veggies
- Using a sharp knife or mandoline, slice the cukes into long, thin strips. Then dice the strips into small chunks, about the size of a split pea. Dice the peppers and onions into slightly larger pieces.
Salt the Veggies
- In a large, glass or stainless steel bowl combine the pickling salt and turmeric. Add the diced veggies and stir to thoroughly combine. Cover veggies with cold water and a few ice cubes. Stir, and let brine for 2 hours. Drain and thoroughly rinse veggies.
Prepare the Jars
- While veggies are in the salt brine, prepare the pickling brine and the canning jars. Wash and dry 4 pint canning jars and the new lids. Fill canner or large stockpot with enough water to cover the jars by one inch. Place jars in water and bring to a boil. Turn off heat and allow jars to remain in the hot water while you prepare the relish. Place lids in a small sauce pan and cover with water. Bring to a simmer and keep warm – do not boil the lids.
Prepare the Pickling Brine and Cook the Relish
- Combine the brine ingredients in a large stainless steel pot. Keep cloves and allspice berries in an infuser or sachet of cheesecloth so you can easily remove them. Bring brine ingredients to a gentle boil and simmer ten minutes. Remove cinnamon stick and infuser/sachet with cloves and allspice. Add drained veggies. Bring veggie and brine mixture to a boil, stirring occasionally. Remove from heat.
Fill the Jars and Process Them
- Remove jars from hot water bath and drain on a clean dish towel. Crank up the heat under the water to get it back to a vigorous boil. While jars are still hot, divide the veggies evenly between the four pint jars. Add hot brine to jars to fill them to 1/2″ below the top of the jar. Wipe the rims of the jars clean, place hot lid on jars and screw shut to “fingertip tight”. You don’t want the lids loose or the brine will leak out in the hot water bath. However, you don’t want them so tight that the air can’t escape and let the jars seal properly.
- Carefully place filled jars back into the boiling water bath. You may need to remove some of the water for the now-filled jars to fit without overflowing the pan. You need the jars covered by 1 inch of boiling water, but leave enough space in the pan for the water to have room to boil. Bring water back to a boil, cover pan loosely and once the water is boiling, set a timer for 10 minutes.
- When timer goes off, turn off heat and remove pan lid. Wait five minutes before removing jars from the water bath. Carefully lift jars from water and place on towel to drain and cool. You should hear a “pop” as the jars cool and the lids seal. If any jars do not seal, refrigerate immediately and use within a month or two. Properly sealed jars of relish can be stored in a cool, dark cupboard for up to a year.