Baking Fail? Six Easy Tips to Go from Failed It to Nailed It

There’s not much more frustrating or panic inducing in the kitchen than a baking fail. Okay, maybe a fire. But a baking fail is a close second. It never happens when you’re making a treat for yourself or your family. It happens at 10 pm when you need those burnt cookies for a bake sale the next morning. Or right before your Bible study group arrives, and there you are with an apple cake that looks like some racoons helped themselves – see above.
Trust me – words were said when I tipped that apple cake baking fail out of the pan 😡😫
Been there?
Sometimes you can blame your disaster on a wonky oven. That’s the story I’m sticking to for a severe pizza baking fail that I was forced to feed my entire extended family while visiting relatives. More often that not, it’s plain old user error. But the great news is, most baking fails have easy fixes that don’t require years of experience or special training.
If your baked goods are more “blah” than “ahhhhh” read on for the most common causes of baking fails and their simple fixes!
1. Not reading the recipe thoroughly.
This is often the pitfall of the confident or experienced baker (and my #1 issue). You got this, until you don’t. Ever been halfway thru a recipe and discovered “oops – I don’t have any sour cream!”? Fail. Or ever been about to pop something in the oven that you need to serve in an hour and suddenly read “chill 4 hours before baking.” Oh well, there’s always ice cream!
You gotta read the recipe, not skim it – and not just the ingredients, but all the instructions!
It’s always best practice before you start a recipe to gather ALL the ingredients to ensure you have everything you need. And I’m not talking about running a mental checklist. I mean physical goods on the counter. I can’t tell you the number of times I’ve started a recipe sure I had enough flour, nuts, powdered sugar or whatnot, and when I went to grab that ingredient mid-recipe, I discovered I didn’t.
It’s also mission critical to carefully read the instructions, especially taking note if something needs to chill, rest, proof, etc. Those kind of steps add a lot of time to recipe, time you may not have.
2. Sloppy measuring techniques
Be wary of “eyeballing it” in baking. Sure, a “splash” of vanilla usually works, and I’ll cop to occasionally guestimating things like herbs and spices. Altho, I will say I once ate a dessert where the hostess had “eyeballed” the amount of vanilla she put in her whipped cream. She dumped in so much vanilla the whipped cream was beige (uh oh) and it tasted so BAD! Folks, ruining whipped cream is more than a baking fail, it’s a sin!
Here are some tips to up your measuring game:
- Liquids should be measured in liquid measuring cups with your eye level with the measuring line to accurately read it.
- Dry goods should be measured in quality, reputable dry measuring cups and spoons. What do I mean by “reputable”? A solid brand like OXO or All Clad, or a set you buy in a store like Sur la Table or Crate and Barrel. You would be surprised how “off” a cheapie set can be. I once got a freebie set of melamine measuring cups and when I made one of my tried and true recipes using them, it came out awful. I checked the cups against a “good” set I had, and these new ones were almost 30% off!
- When measuring dry goods like sugar, leavenings, spices, etc. scoop the ingredient into your cup/spoon and carefully level it off. No “rounded” cups or spoons unless the recipe specifically calls for that.
- Flour requires special care. A cup of flour is supposed to weigh 4.5 oz., but if you swoop a measuring cup thru a bin of flour you are all but guaranteed to pack in way too much (by weight). Too much flour will make your baked goods dry, tough, etc.
Who wants to weigh flour every time? I sure don’t! So here’s what I do for flour: I keep a chopstick in each of my flour bins. I use the stick to swirl through the flour and fluff it up before I gently, and lightly, sweep my cup thru the flour. The chopstick is also great for leveling the cup off. This simple technique helps me get an accurate (I have weighed it several times) measure of flour.
3. Overworking your batter/dough/etc.
Unless you are making a yeast bread, gluten is not your friend. Sure, you need some for structure, but in your average baked good you want to keep that stuff to a minimum. Gluten is formed as you stir, whisk or otherwise beat your dough or batter. You know you’ve overdone it if your biscuits and cookies are tough and dry, your cakes and muffins are dense and flat, and your pancakes could be used as frisbees.
Seriously, this is the one tip that makes the difference between baked goods that are gloriously light, tender and fluffy and ones that are tough and unpleasantly chewy.
A few tips for going easy on your batters and doughs:
- When using an electric mixer, use the lowest setting necessary to get the ingredients incorporated.
- Follow the recipe! If the recipe says, “mix on low” don’t mix on medium. If it says “beat for 1 minute” don’t walk off and let it go for 3.
- A few lumps are fine in wet batters like those for pancakes, cornbread, or muffins – don’t beat that batter smooth.
- For cookie or cake batters, beat until ingredients are just combined unless the recipe instructs otherwise. Use a spatula to scrape the bowl and fold in those last bits of dry ingredients.
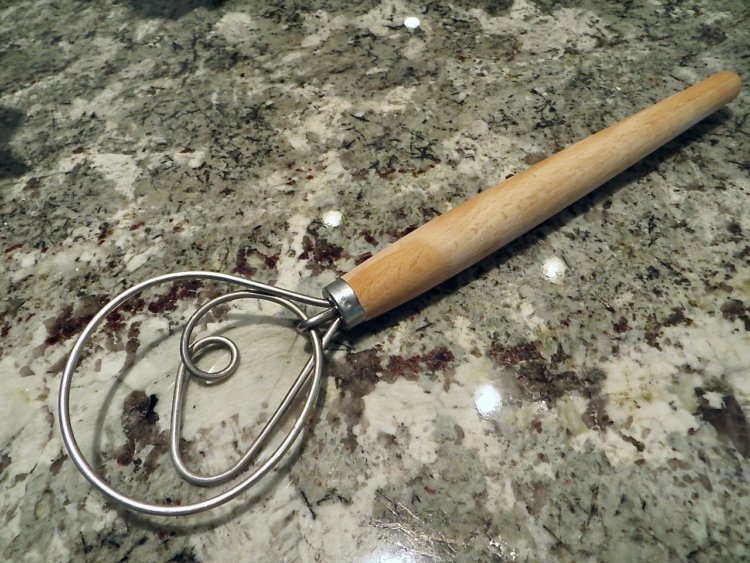
- A dough whisk (image below) is an amazing tool for mixing pancake, waffle, biscuit, quick bread or any batters that don’t need to be creamed. It does a great job of incorporating everything and scraping the bowl sides while its odd shape makes it very hard to develop a bunch of gluten.
4. Poor quality (or the wrong kind of) bakeware.
Do your cakes come out domed in the middle with hard dry edges? Are your cookies scorched on the bottom and pale on top? Are your muffins or quick breads always overbrowned and dry on the outside? Girl, it’s not you, it’s your bakeware!
Could be your oven (see #6) but let’s start here. The five magic words you are looking for when buying bakeware are “light colored, heavy gauge aluminum.” Nonstick or not, that’s up to you. I prefer nonstick, but that’s me. Surprisingly, the difference between crap that will ruin your food and “the good stuff” is only a few dollars.
Why your choice of pan matters so much:
- Dark colored pans overheat and scorch your food on the outside, leading to burnt, dry edges and bottoms. A cake, muffin or quick bread baked in a dark pan will always dome up like crazy in the middle. Why? A dark pan cooks the edges too quickly, so as the leavening works to raise the batter, it’s forced to work in the only place the batter isn’t set – the middle. Do yourself a huge favor and ditch any dark bakeware you have.
- Light colored, heavy weight (heavy gauge) pans allow the edges to cook slower, leading to even doneness and proper browning. Your muffins, cupcakes and breads will have gently domed centers, and your cakes will bake up nice and flat. No more wibbly-wobbly layer cakes or the torture of having to slice off the domed tops! And your cookies will have time to brown on top before their bottoms scorch.
- For sheet or snack cakes, brownies, and bar cookies, always use a pan with perfectly square (not rounded) edges. Get this – a rounded edge robs the pan of enough volume to actually alter the baking time. The center will take just enough longer to cook through that the edges will be overdone. I’ve seen the scientific proof. Go figure. So those glass and ceramic baking pans are a no-go for cakes, brownies, etc. Heavy gauge, light colored aluminum pans with folded, square corners are what you want. Bonus – your baked goods will look more “professional”.
- Use the size and shape pan called for. If you don’t own that pan, buy it or find another recipe. Even if your substitute pan has the same volume, shape affects baking time. It takes some PhD level baking smarts to figure out the time and temperature adjustments you need to make to bake something properly in the “wrong” size/shape pan. Geometry was the only maths class I aced, so I do it all the time, but don’t go there if your math or baking skills aren’t there yet.
5. Failure to double check your work
It’s so easy to get distracted while you’re baking, and a distracted baker often means something gets left out. And something left out can lead to a serious baking fail. Before anything goes in the oven (actually before anything even goes into a pan!) it’s wise to do two things:
- Read thru the ingredients one last time to make sure all the guests have made it to the party.
- Taste BEFORE you bake. There you have it – permission to lick the spoon or sample the cookie dough, as if you needed it! True (horror) story: I was in charge of making the birthday cake for my Dad’s 90th. The batter was in the pan and ready to go in the oven. As a treat I licked the spoon and YUCK! Holy smokes – I forgot to add any of the sugar! Attention to detail fail!
6. Your oven may be the enemy.
First things first. I promise you, your oven is NOT preheated when the chime goes off. Nope. Not ever. The chime goes off when the AIR in the oven is at temp, not when the walls of the oven are at temp. If you open the oven at this point to put those cookies in, boom. You just dropped the oven temp a LOT. The oven will blast on the heat to raise the temp back up and now those innocent cookies are getting scorched.
You need to wait a good 10-15 minutes past the “preheated” chime to be certain your oven really is at your desired temp. This way, when you open the oven to put your goods in, the temp doesn’t drop much so your goods will bake at an even temp. Bonus points if you keep a proper oven thermometer in there to double check.
If your oven is properly preheated and your baked goods are still getting scorched or taking forever to bake (which can create just as bad a situation), you probably need to recalibrate your oven’s thermometer. Some temperature swings are inevitable as your oven cycles between heating and maintaining a temperature, but you want the average temp right.
Here’s how to check if your oven needs to be recalibrated:
- Get a good quality oven thermometer.
- Preheat your oven to 350 with the oven thermometer in there, and let it go for 30-40 minutes. After the first 20 minutes, check the oven thermometer every 5 minutes and record the temps you see.
- If the temps are all over the place (325, 340, 375) or waaaay off 350 you probably need to have a tech come look at your oven.
- If the temps are close but consistently above or below 350, grab your oven’s manual and follow the directions for recallibrating your oven’s internal thermometer. I promise you it’s super easy and will make a huge difference.
There you have it – six easy ways to take your baking to the next level! Happy baking!

Here are some foolproof, family-favorite recipes to use your baking skills on: